I saw this idea on Splitcoaststampers.com where someone stamped the image and then ran it through the crimper. Their's was a flower and it looked really nice. I thought I would try it with this stamp from the Winter Wonderland set. I'm not sure if I like it or not. What do you think? The color I used is Real Red card stock and ink, both from SU as well as the stamp set. The Merry Christmas stamp is from the Artful Stamper and the white paper and ribbon is from Wal-Mart .
.
Thanks for looking.
~~Rita~~
Thursday, November 30, 2006
Winter Wonderland
Wednesday, November 29, 2006
Quick Stamp
I needed a card to post today and it needed to be quick and easy. I went to my stamp room to see what I could come up with and this is it. I started this one last week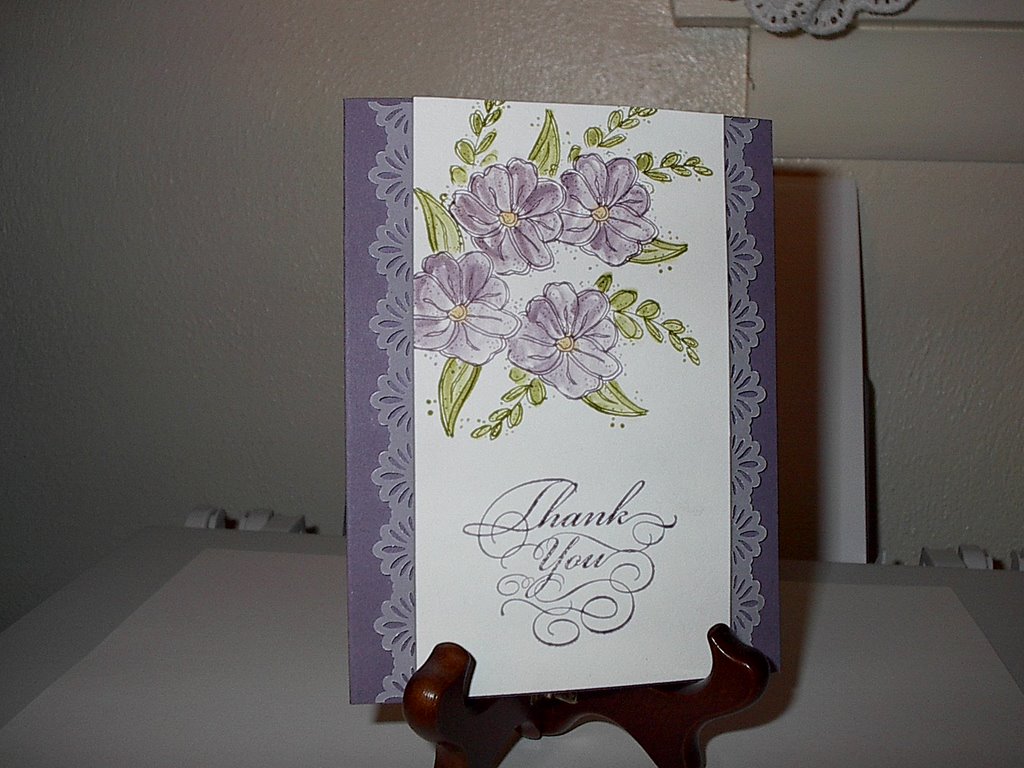 . Had the card stock cut and folded, the Vellum cut with a Fiskars Border Punch (Sunburst), attached that to the card front and wasn't sure where to go from there, so it just laid there waiting. I decided In Full Bloom and Elegant Greetings (SU) were the perfect stamp sets to use on it. After stamping the flowers I then stamped in the leaves using the masking technique. I colored the flowers with Perfect Plum and the leaves with Old Olive using my blender pen. The flower centers are Barely Banana. All supplies except the vellum are Stampin' Up. Thanks for looking.
~~Rita~~
Tuesday, November 28, 2006
The Tree is Up!
Ok, it's official, I have now run out of samples to post. So today I decided to show you what I did yesterday. I never did have what it takes to decorate a tree and have it turn out like the ones in the department stores. My mother always had a beautiful tree and my daughter's tree always looks like it came right from the department store showroom. I guess it skipped a generation because no matter how hard I try it never looks as good as everyone else's. So, here it is in all it's glory, my Christmas Tree (it looks a little better in real life). Now I have to find some time to make a sample or two so I'll have something to post tomorrow. Thanks for stopping by and have a Blessed day.
~~Rita~~
Monday, November 27, 2006
Self Portrait
I hope everyone had a nice Thanksgiving weekend. Mine was quite busy. We enjoyed a fabulous dinner with family and friends. The food was absolutely delicious. The best part about it was that I didn't have to do a lot of cooking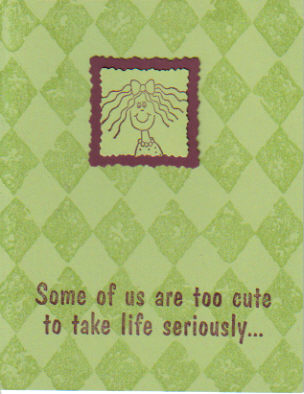 or clean-up. Friday we ventured out to Kohl's to get one item I wanted at the "door buster" price. I stood in line 45 minutes to pay for it and now I have to take it back because it's not what I thought it would be. Oh well, life goes on. Saturday I did my good deed for the week and rang the bell for the Salvation Army. It was like 60 degrees, I think I would've preferred it to be cold and snowing, then it would feel more like Christmas. Anyway, I plan on doing it again.
Sunday was Sunday School and Church. After I got home I cleaned my overdue stove and oven, I'll have to do it again in 5 years.
Now for today's card entry. This was done useing Frazzled from TAC and Print Pattern from SU. The card stock is Celery Green and Bravo Burgundy, also SU.
I love this set from Tac, it has four different images and I thought this one looked a lot like me right now.
Thanks for looking.
~~Rita~~
Wednesday, November 22, 2006
Distressed Flower
This is the other card I made at the Sunday Funshop. I really like this one. The supplies used were all from TAC and were as follows: T2573 Distressed Designs, T2287 Ribbon Words, T378 Crackled Background, T2283 Fanciful Flowers, TT1205Wishing You, Black and Aspen Card Stock. The ink used was Noir Charcoal and Gognac. This was a little time consuming but I think it was worth it. Thanks for looking and Happy Thanksgiving!
~~Rita~~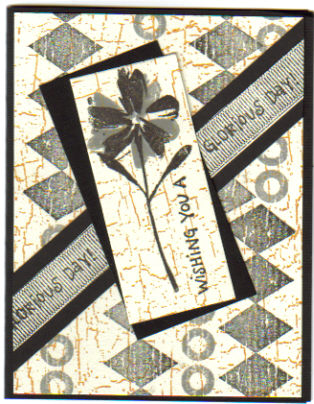
Tuesday, November 21, 2006
Another Funshop
I went to another TAC funshop this past Sunday afternoon. I had just enough time to come home from church, change clothes and drive to the next town over. We had a lot of fun, as usual. This is one of the two cards we made. Since I'm not real familiar with TAC colors I can't tell you what color green this is. We were supposed to sand it before stamping, but as usual I didn't listen and stamped first, so I sanded around the edges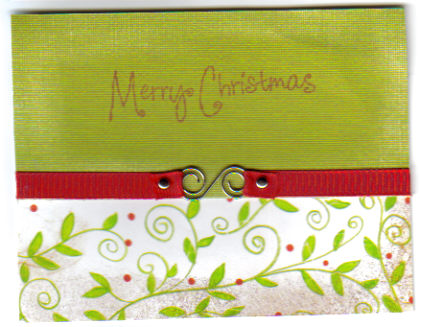 . The print paper is from Vintage Holidays. We sponged Burnt Umber lightly around the edges to give it a distressed look, then attached red ribbon to a spiral clip using silver brads.
Thanks for looking, Feel free to leave a comment.
~~Rita~~
Monday, November 20, 2006
God's Country
We've returned from our trip to Holmes County, otherwise known as Amish Country. They don't call this God's country for nothing. It was simply beautiful. We had a very relaxed and busy two days. They roll up the sidewalks at 5:00pm so the rest of the evening was spent reading and relaxing. The B&B we stayed at was actually a three room apartment with NO TV! But for $55.00 a day it was a steal. We went to a restaurant down the street for our free breakfast, they stay open till 8:00pm so we had dinner there also. The food was great! Our lodging was within walking distance of all the shops so we heard the clip clopping of horses all evening going past our window to the little store accross the street. There were some things we wanted to see that weren't open after October so we plan on going back another time.
~~~~~~~~~~~~~~~~~~~~~~~~
The card I'm posting today is the one I made for my husband's retirement. The car is from a set called Vrooom (TAC) and the card stock is SU. I did the sentiment on the computer. The inside says......You're both retired.
Until tomorrow, thanks for looking and have a great day.
~~Rita~~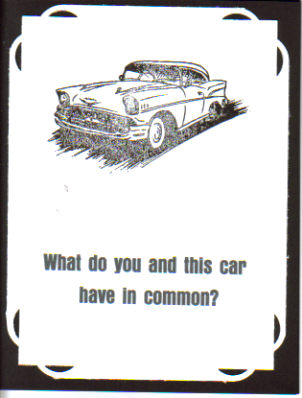
Monday, November 13, 2006
Going Out of Town
This will be my only post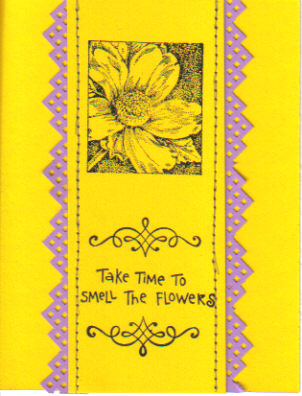 this week. My husband decided after 40+ years it was time to retire. So to celebrate we're leaving for a few days to go visit Amish country. I have a lot of things to do before we leave so I won't have time to get any more cards ready to post. In case you didn't notice, I have a new Blog name. I went to Beta this morning and decided to change the name.
Today's entry is another Note card. I used the Square Steps Corner Pocket Punch to make the border for the center strip. I took off the guard and punched down the side of each strip. After paper piercing the sides of the center strip, I then adhered the punched strips and attached it to the center of the card. All products used are Stampin' Up except the sentiment which is from TAC. I hope everyone has a wonderful week. I'll be back next Monday. Thanks for looking!
Friday, November 10, 2006
TAKE PRIDE
When I saw this stamp set from The Angel Company I fell in love with it right away. I think the saying says it all. I stamped using Basic Black on Going Grey card stock from Stampin' Up. The main image is layered on Basic Black card stock. I thought this would make a nice Note Card, but after thinking about it a little more I decided it could also be used for graduation or maybe even retirement. I think I'll add some brads or eyelets to the next one. Thanks for looking and have a Blessed weekend. ~~Rita~~
Thursday, November 09, 2006
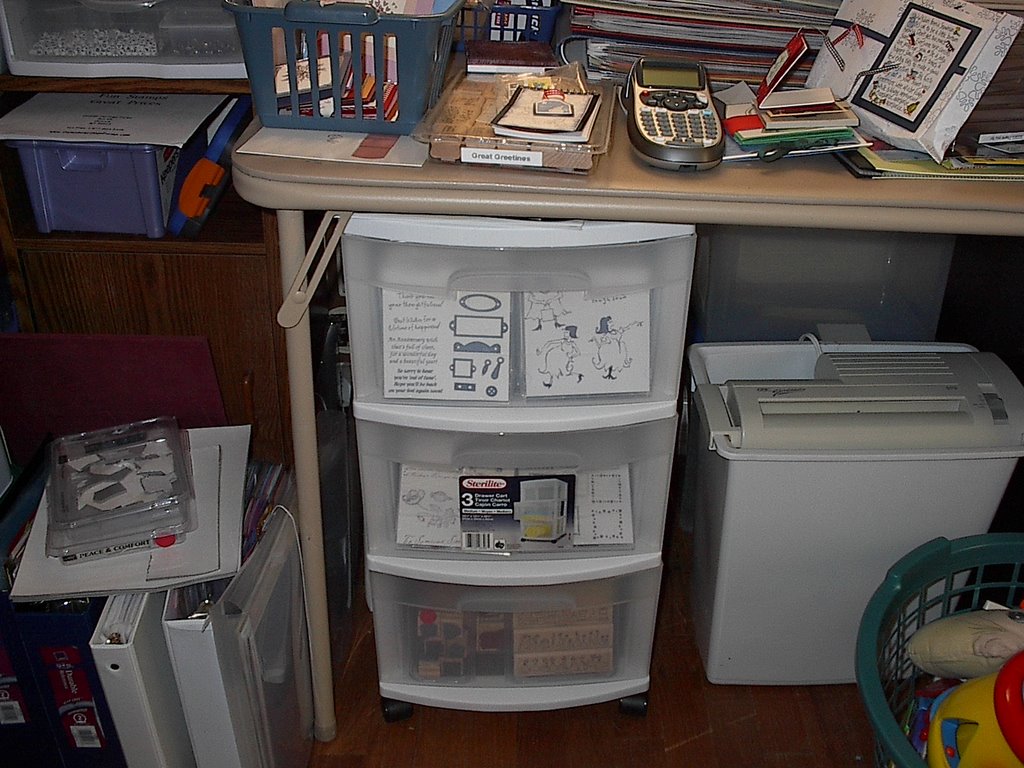
The Rest of my Stamping Room
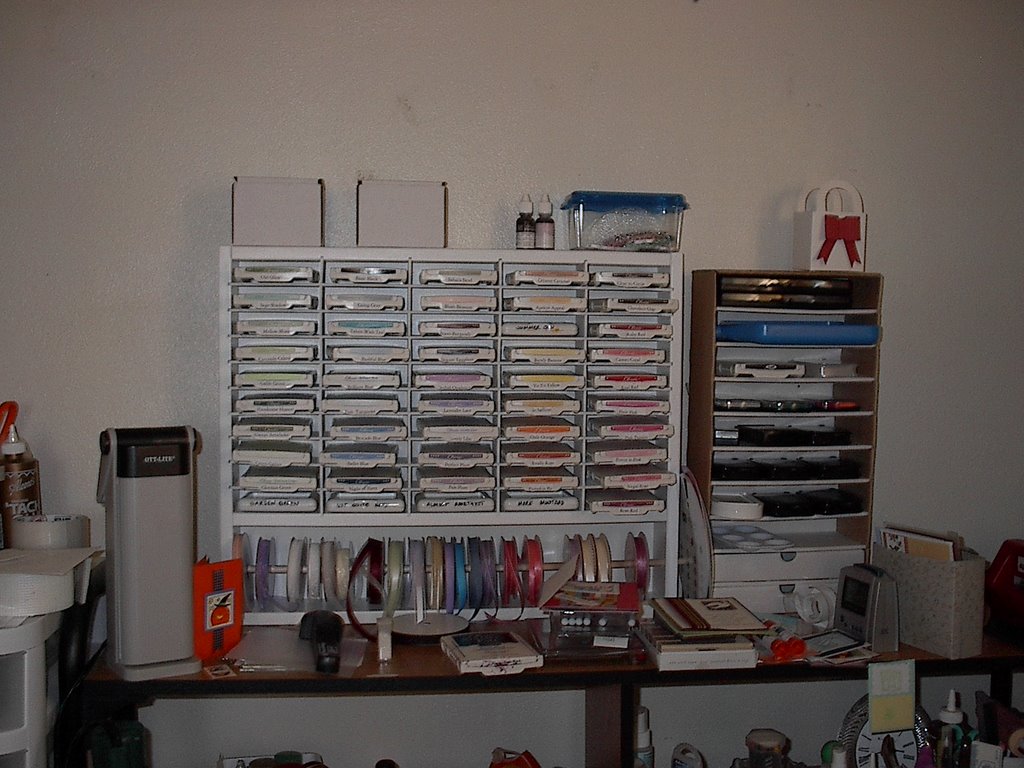 Instead of posting a card today I decided to show you the rest of my stamping room. These are the last 3 pictures. I use an old computer desk for my work space, it has a shelf at the back and this is where I keep all my stamp pads and rolls of ribbon.
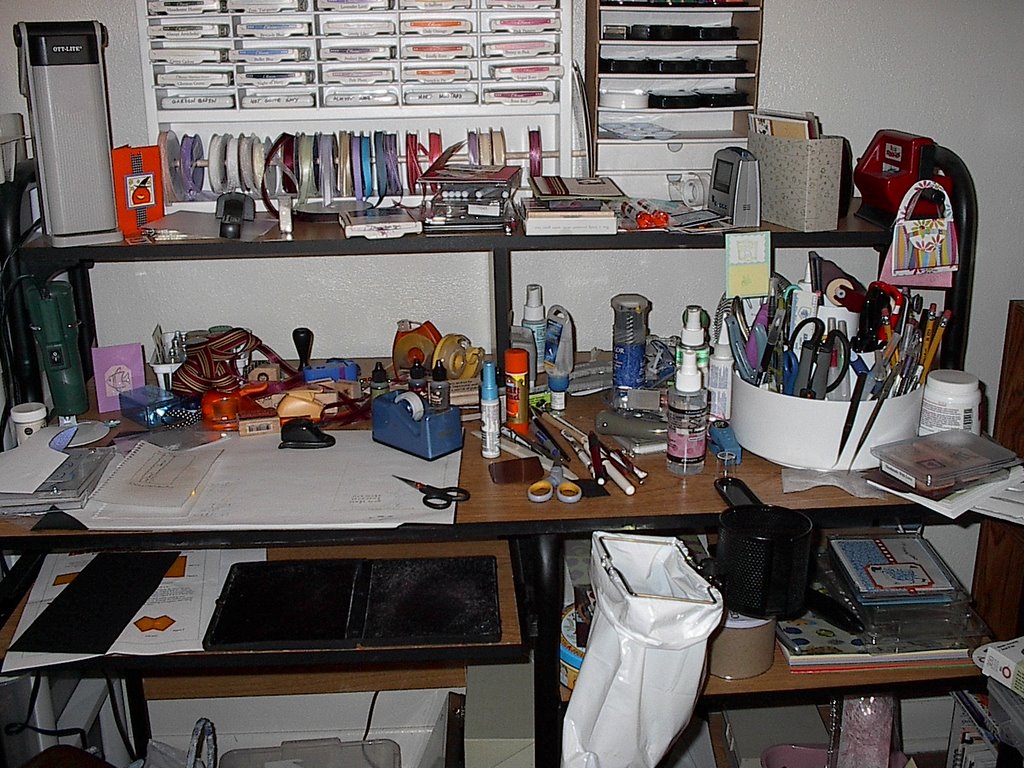
This is my work area. WHAT A MESS! I just can't seem to work in a clean area. I keep my stamp cleaning pad on the pull-out shelf (where the keyboard goes) for easy access. That's a scrap bag and drink holder to the right, gotta have that drink holder!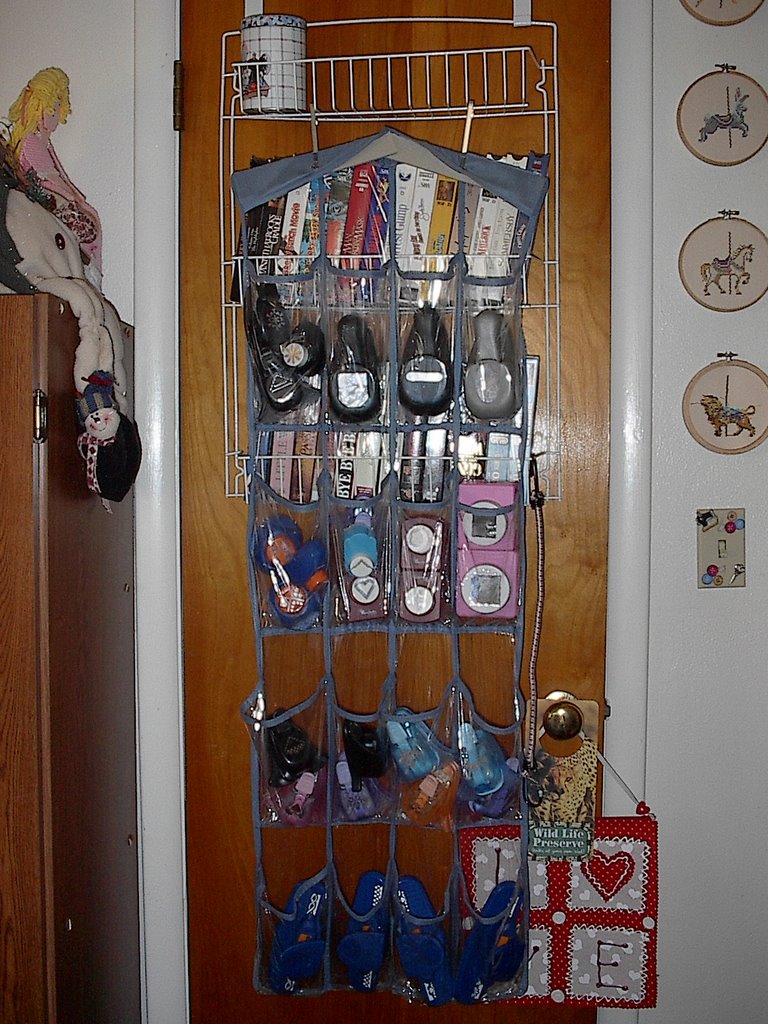 Here is where you'll find my larger punches and border punches. I put them all in a shoe organizer that hangs over the closet door.
I hope you've enjoyed looking at the pictures of my stamping room. Any suggestions on organization will be truly appreciated.
~~Rita~~
Wednesday, November 08, 2006
Ladybug Thank You
Every day I upload my images in the same order. So today the card came up first instead of my stamp room. I guess it doesn't matter in what order you choose Blogger is going to make the final decision. With that said here's today's card. This is just about as simple as you can get. I stamped the image in the center of white card stock, stamped a sentimant at the bottom and tied a ribbon on the side. Sometimes less is better. All products used except the ribbon are from Stampin' Up.
~~~~~~~~~~~~~~~~~~~~~~~~~~~~~~~~~~~~~~~~~~~~~~~~
This area of my stamping room is to the left of the scrapbooking table and the right of my work area. This is where you'll find all my pens, markers, adhesives, eyelet setters, beads, tags, daubers, liquid applique, stampa-ma-jig, paddle punches, stamp spots and snap alphabet stamps.
until tomorrow, have a great day and thanks for looking.
~~Rita~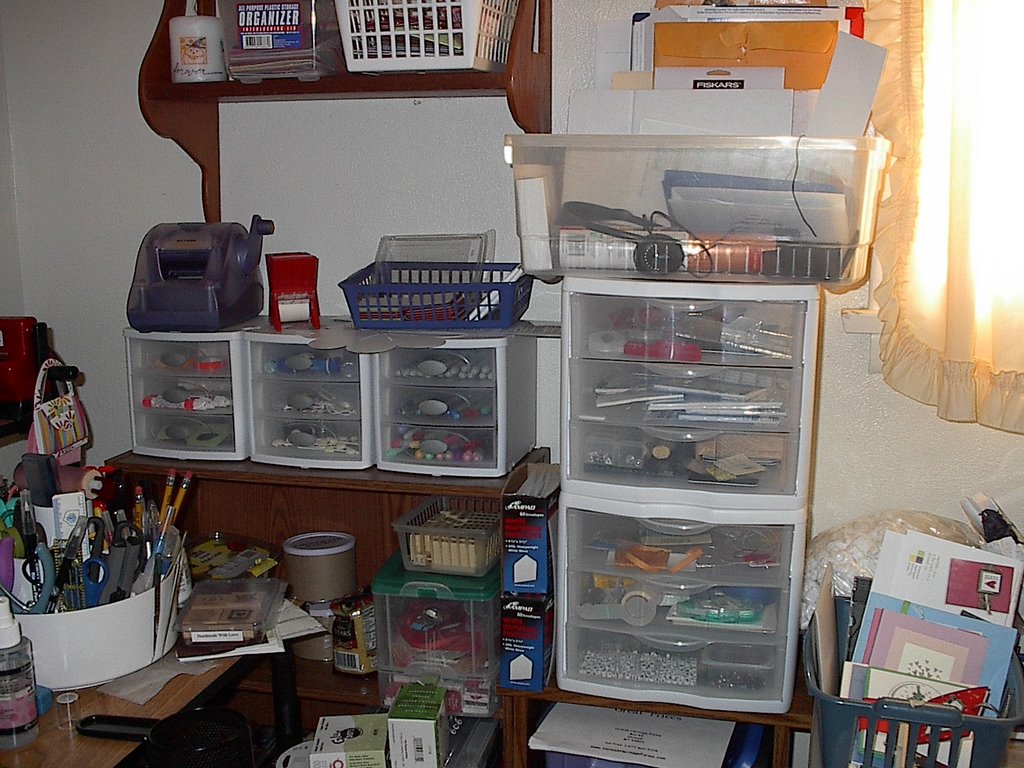
Tuesday, November 07, 2006
Clutter Queen
OK, here's the table I do my scrapbooking on. As you can see it needs a little organization. Those are some of my scrapbooks stacked in the back. The rest of them are stored away.I have about 10 or 12 completed and another one I'm working on. The basket has cards I haven't put away yet. Next to that is my label maker and some card magazines. Behind are some mailing envelopes and empty stamp boxes that I haven't decided what to do with.
The card for today is another one I did using that wax paper technique. I wanted to try out my newest stamp set, Take Three from Stampin' Up, and this is what I came up with. After doing the technique I tore a strip, punched holes in the bottom center, tied a ribbon and attached it to the card. I then attached the stamped piece to that. The card stock I used is Pumpkin Pie and the ribbon I think is Garden Green. This was simple, but I think it turned out pretty good. Thanks for looking.
~~Rita~~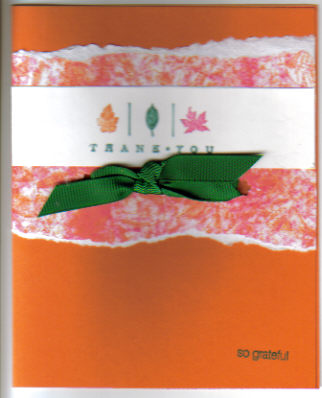
Monday, November 06, 2006
Stamps, Stamps and More Stamps
 This is to the right of my work space. I keep all my TAC and other sets that are stored in CD cases in the top two drawers. The bottom drawer has more SU sets. The 4 binders on the floor to the left are my card and ATC samples. I'm running out of room for all this "stuff"! Tomorrow I'll show you what's on the table above.
Today's card was made using the stamp set Bitty Bugs and Fruity Fusions paper from TAC. I just love this set, it has so many cute little bugs. The orange card stock and Mulberry paper is from SU.
Well I'm off to the eye doctor's, so until tomorrow, have a great day and thanks for looking.
~~Rita~~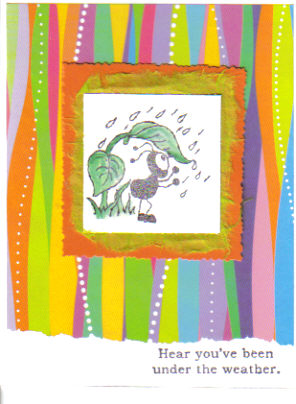
Friday, November 03, 2006
TGIF
Here's another view of my stamping room. This one is to the left of my work area. Some of my stamp sets are in the large drawers . The small drawers contain cutting templates, embossing powders, glitters, acrylic blocks, embellishments, and my paper trimmer. I keep books of scrapbook papers in the cardboard storage unit. As you can tell I have a lot of clutter on top, this is where organization comes in handy.
 Instead of a card I decided to post these Prayer Books I made the other day. These make nice gifts or Craft Fair items.
Thanks for looking and have a Blessed weekend.
~~Rita~~
Thursday, November 02, 2006

Live, Love, Laugh
I wasn't sure how this card would turn out using these colors together, but I love it! I did the Faux Stitching technique down the middle and paper pieced the dress. This is another one of my favorite sets from The Angel Co. (TAC).
View #3 of my stamp room is a cupboard where I keep my Background (top shelf)and Alphabet Stamps (bottom left). I also have Fiskars Cutting Templates, Eyelets, Brads and Beads stored here.
Thanks for looking.....Rita~~
Wednesday, November 01, 2006
Trying a New Technique
Well I see I got it backwards today, the card was supposed to be first. Anyway, this is another area of my stamp room. It's to the left of the card stock files and it's where I do my die cuts. I have a Sizzix Big Shot and the dies are in the baskets on the shelf. My CD player is behind that "BIG" TV. I like to listen to some TV programs or music while I'm working.
Okay, now for todays card. I tried a new technique that was a lot of fun. You take a piece of wax paper and wad it up, then smooth it out on your work surface. Take an ink pad, I used Creamy Caramel, and smear it all over the wax paper. Next, lay a piece of Glossy White CS on top and brayer over it. You can add a second color if you like using another piece of wax paper. Well, I'm off to Hobby Lobby!
Thanks for looking and have a great day.
~~Rita~~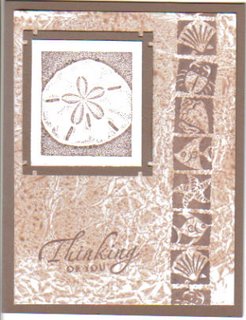
Subscribe to:
Comments (Atom)